CSV files are one of the most common file types for delivering data and creating reports. However, it is important to understand that CSV files are just raw data, not a full spreadsheet that you would expect.
Google Sheets is Google’s answer to Microsoft Excel and part of their wider suite of products that is available through Google Docs. If you would like to turn a CSV file into a Google Sheets spreadsheet so that you can add formatting, visually change data, and in general make your data more presentable — follow the steps that are outlined in this article.
Importing CSV files into Google Sheets is relatively easy. With just a few clicks you can import CSV files into your Google Sheets account and begin to format and edit the data within your file.
Let’s dive into how you can convert a CSV file to Google Sheets:
How to Import to Google Sheets
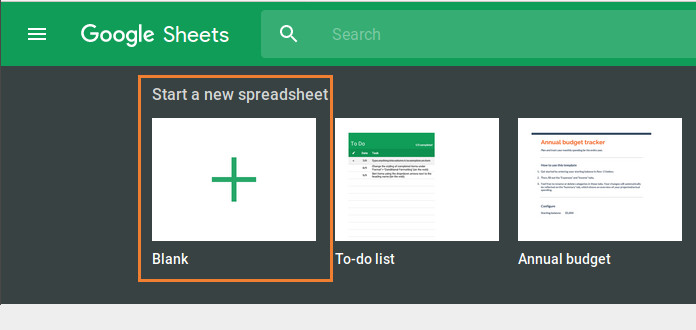
Step #1: Log in to Google Sheets and then click on the button that says “Start a new spreadsheet,” and select “Blank.”
As we’ll be importing our own file, we don’t want to use a pre-selected template and instead just want to use a blank file.
Once the spreadsheet is open, then we can take the next step.
Step #2: Click on the “File” menu, then click on the “Import” button.
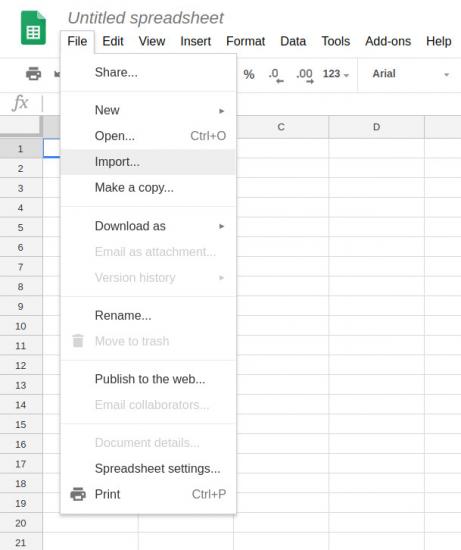
This will open a new window where you are prompted to select the file that you would like to import. Initially, the system will try to get you to import a file from your Google Drive account. Likely, the file is located on your computer instead.
Step #3: Click on “Upload” on the far right side of the “Open a file” menu bar.
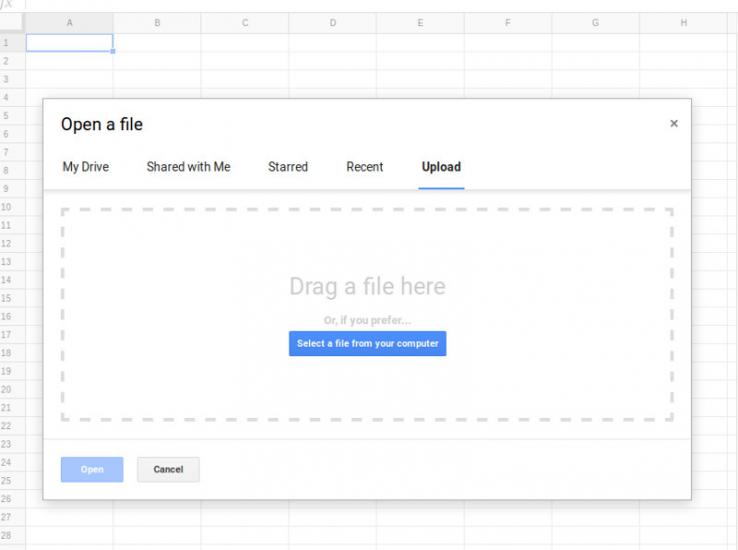
Then, click on “Select a file from your computer.” Navigate to where the file is within your folder structure and open it. Alternatively, you can drag and drop the file straight from an open folder into the dashed box on this screen as well. This will open up a new screen.
Step #4: Select the correct import settings for your file.

On this screen, most of the time, you’ll want to tell the program the name of the file that you want, and that you want to create a new spreadsheet (rather than replacing data or importing data into the system). You’ll also want to tell it what the separator is within the file.
CSV files can use any type of separator to separate data and create the different columns. Most often, the separator in CSV files is a comma. However, you can also ask Google Drive to select the separator type automatically. This works for most CSV files as long as there are not unique considerations for your specific file.
Additionally, you can ask that on import, text is converted to numbers and dates. If you do not want your data to be changed, make sure to select “No” here. Keep in mind that this option only applies to text fields, which can contain numbers, but are not specifically assigned as a “number” or a “date” on the base import. If you want to use Google Sheets to alter the data and use features that are specifically meant for numbers, you will need to convert text to numbers and dates.
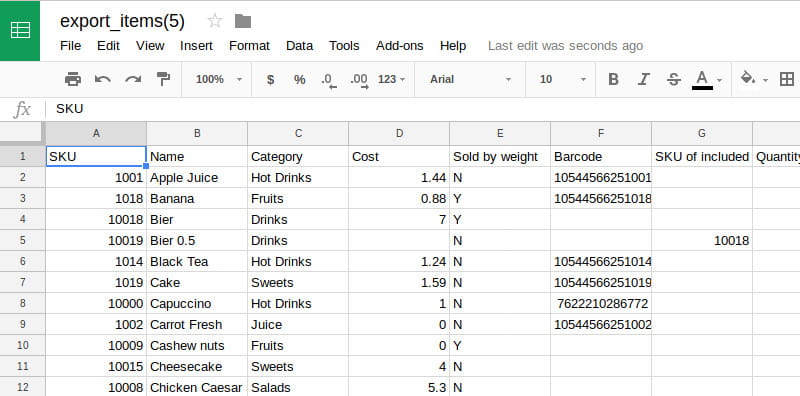
Then, you should see your data imported into a Google Sheets spreadsheet.
Now you can edit all of the data within the spreadsheet. Once you’ve finished, you can then export the spreadsheet as any of the compatible file types within Google Sheets including CSV.
How to Export a File From Google Sheets
To export your spreadsheet again as a CSV, you can just go to the “File” menu and select “Download as.” There, select “Comma-separated values”.

This will download the file as a CSV. There are multiple file types that you can export a Google sheet as, including:
- Microsoft Excel (.xlsx)
- OpenDocument (.ods)
- PDF (.pdf)
- Webpage (.html)
- Comma-separated value (.csv)
- Tab-separated value (.tsv)
That’s it! Hopefully this article helps you to convert your CSV file to a Google Sheets file and then export it as the file type that you would like when you are finished editing the data. It’s a relatively simple and straight-forward process but one that offers many different options depending on what you would like to do with the data contained in the .csv file.